
TARGET 120509
MAN!!! THOSE ARE SOME BIG FAN BLADES!!!!!
In fact, they are the largest in the world
These are the blades that are used by the huge wind generators out at sea.
You see something like this and you just have to wonder, "How do they make things like that?"
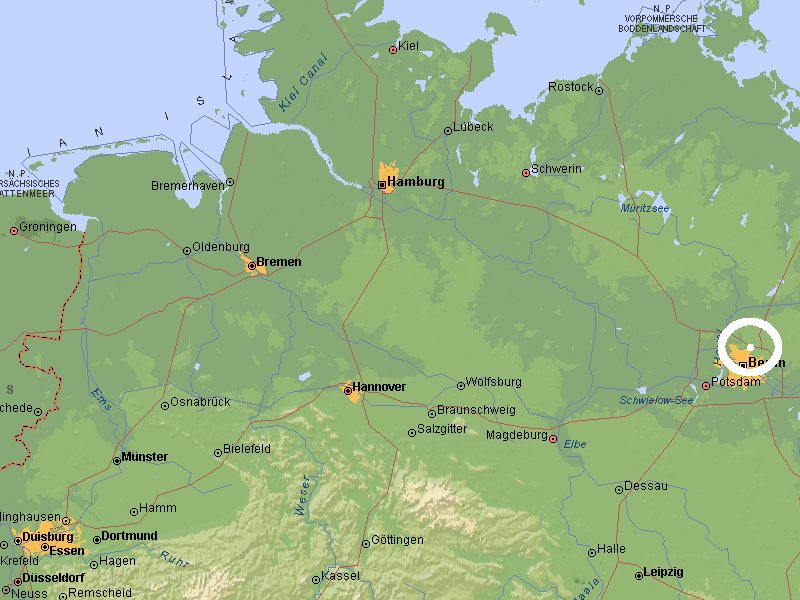
These wind generator blades are produced by the German corporation, Siemens, in its "Siemens Shaltwerk" factory, in Berlin, Germany. Since the giant wind installations are world-wide, Berlin is the only location that was tasked for dowsing.DOWSING FEEDBACK MAP
THE BLADE, THE LOCATIONS, AND THE PROCESS
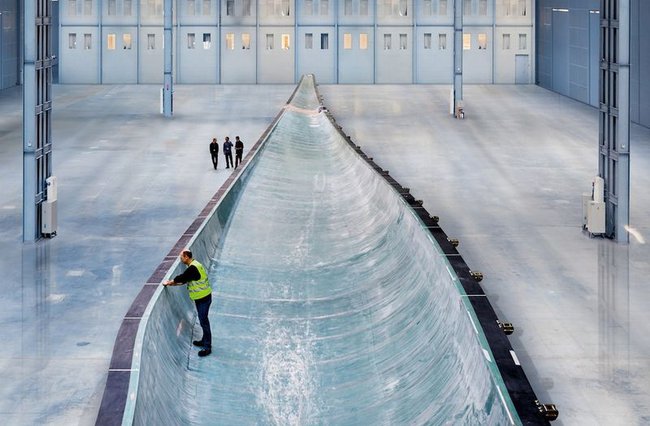
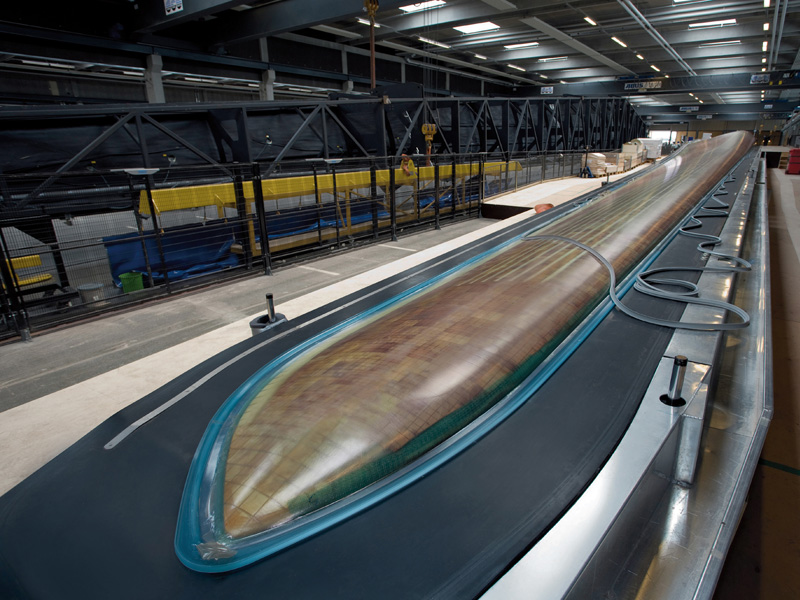
The mold
Because of the great stresses that will be placed on the blade, it has to be a single piece of construction. It can't be made of separate pieces bolted togther, as that would make weak points that would some day give way and come crashing onto the platform or into the sea. So, a mold form has been made in a huge building. The entire blade will be manufactured within this mold. It may not look like it in the picture above, but the mold is sitting on a very long rolling cart that supports the full length of the blade. (see next picture)
In order to keep the blade as light as possible, the entire blade is poured as a single piece made of fiberglass reinforced epoxy resin and balsa wood.
The first layers of resin and fiberglass are laid in place.
First, a coating is applied to the mold to ensure that the resin used in the fiberglass won't stick to the mold. Then, a coat of resin is sprayed into the mold and while it is still wet, long strips of fiberglass matting are carefully stretched the entire length of the blade and soaked with more resin to ensure that they become an integral part of it.
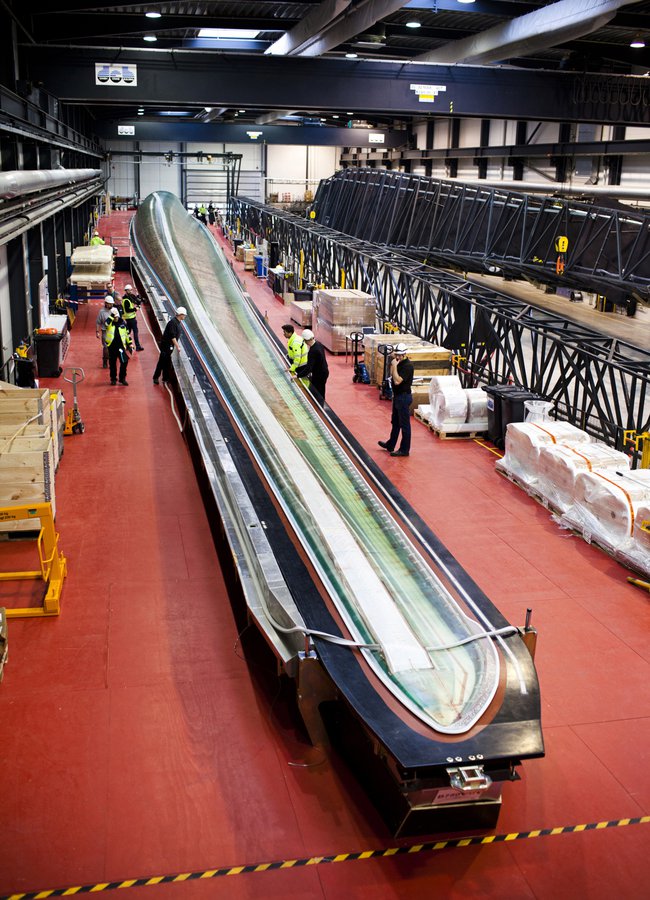
The finished blade
The blade is built in strong layers and then the balsa wood is added. After that, the process reverses as more fiberglass and rosin is applied to the top of the balsa wood.
Once the entire length of the rosin has hardened, the only next steps are to wheel it to a paint shop where it is removed from the mold and painted, then taken to the storage yard to await transport to the site.
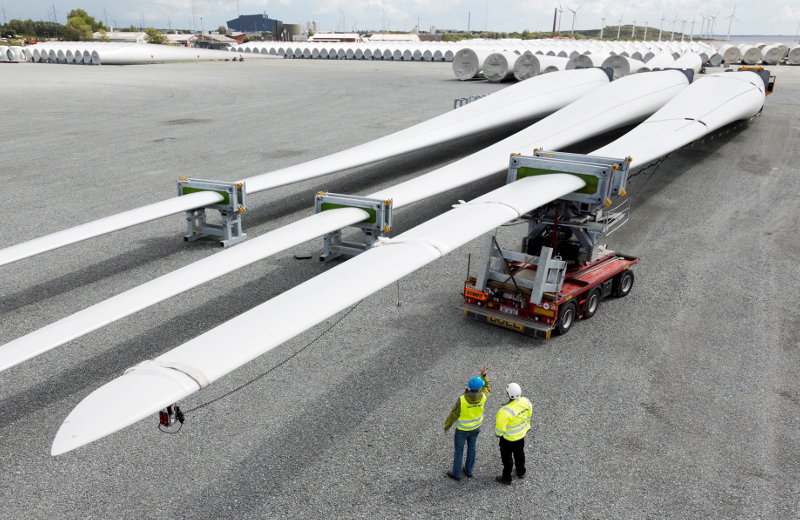
The painted blades are stored until ready for transport, (background) then placed onto a blade support.
The blade support is then loaded onto a wheeled trailer foreground)NOTE TO BASIC AND INTERMEDIATE LEVEL VIEWERS: The feedback above should cover all the information that you were tasked to find. However, as you grow in your viewing abilities, it's very common for more advanced-level perceptions to pop into your sesson, as well. If so, this feedback will give you the experience of letting you realize what those moments of more advanced viewing in a session feel like. You will probably see something and say, "OH! I got that and didn't write it down!!". That experience will teach you to be more sensitive to those fleeting things in the future. If you didn't get any of the more intricate things, don't worry about it. You still did your job. If you did get some of the more intricate stuff, then give youself credit, a pat on the back, (and maybe a piece of chocolate or two).
More advanced viewers are expected to get things like the usage of the final product, measurements, relative sizes, shapes, etc. Therefore, the following feedback information is provided for work done at that level.
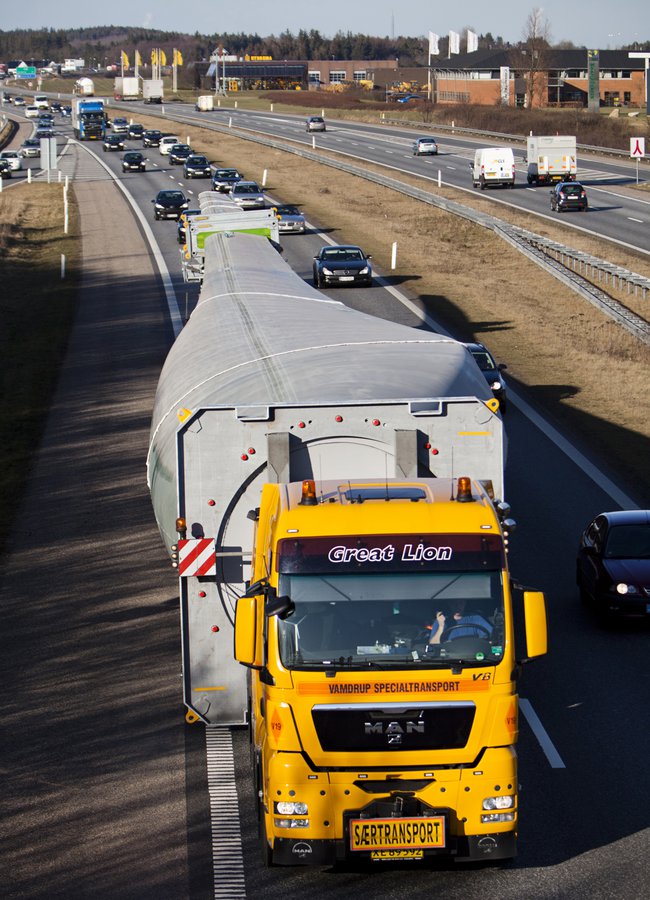
There is no trailor long enough for the blade, so the short trailer follows far behind the truck
as it makes it way through traffic.
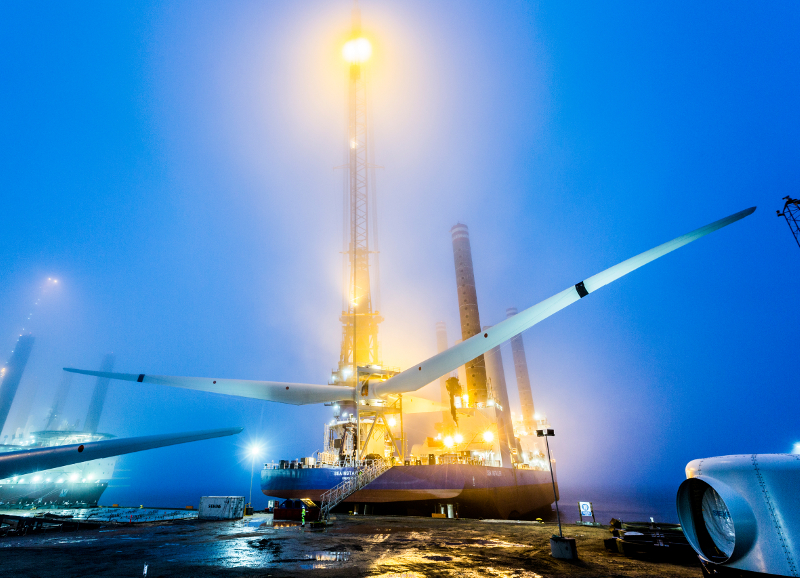
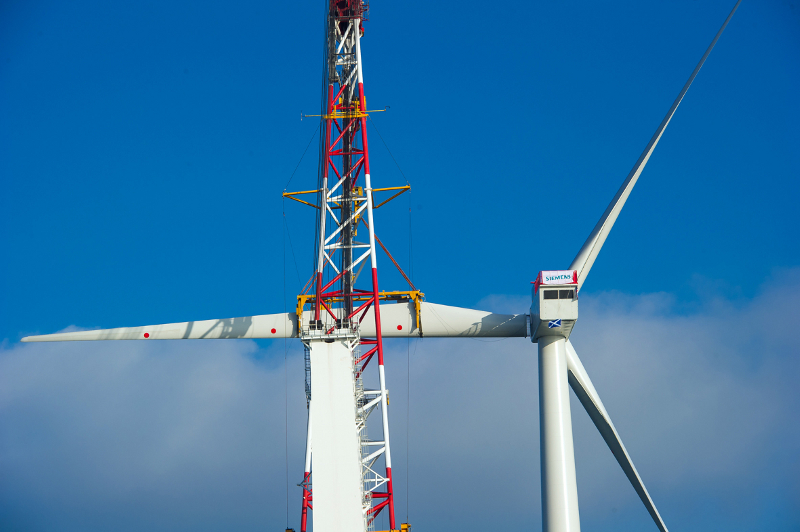
When the blades reach the site, they are assembled into a full propeller, hoisted into
place and bolted securely to the tower mast.NOTE: Some of you may have gotten some shapes that, at first glance, do not seem to fit this target. But I've long known that remote viewers can see things that even people at the site would miss, so I researched for details and found the following information (and pictures):
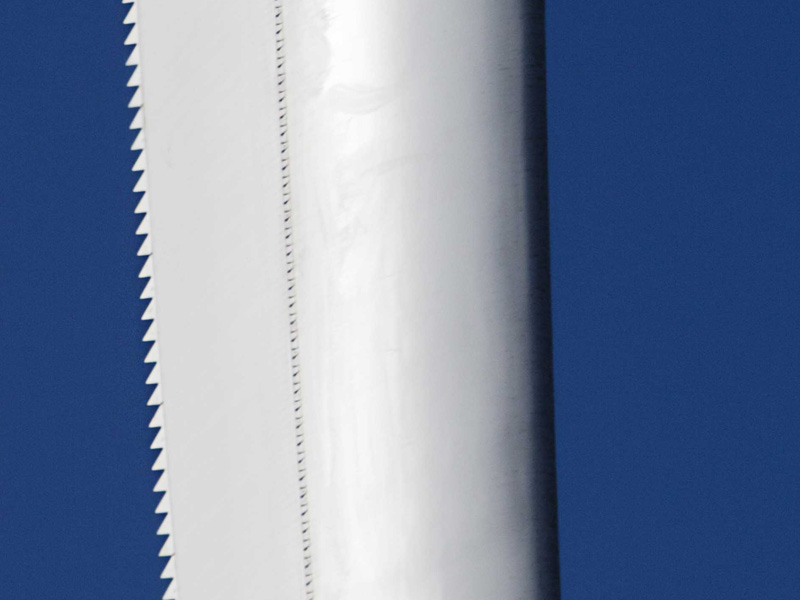
To further boost the efficiency of the blades, the Siemens designers developed the
"Power Curve Upgrade package", which is designed to provide increased energy
production and cut down on the noise of the blades going through the air. It
includes a "DinoTail". (serrated flaps that resemble the tail fin of a stegosaurus
dinosaur). They are mounted at the airflow breakaway edge close to the blade tip,
where most of the noise and energy are produced by the blade. By decreasing
turbulence on the trailing edge, DinoTails enhance performance while still
keeping "local acoustic emissions" (noise) to a minimum.
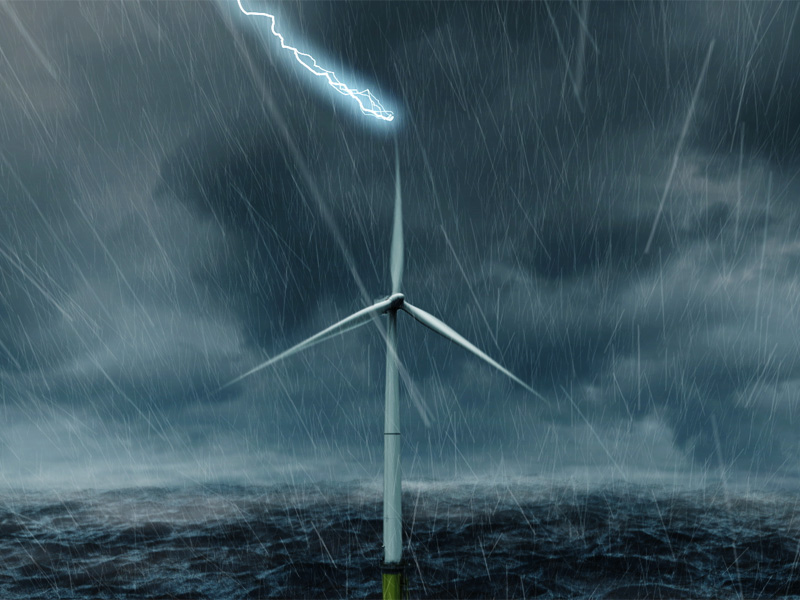
NOTE: On your sketch(s), you may have also gotten a line going the length of the shape. There is a thick wire hidden inside each blade that grounds out the lightning strikes that will inevitably hit the blades. If you picked up on that, give yourself a gold star.
The following graphic gives feedback for those of you who went for measurements.
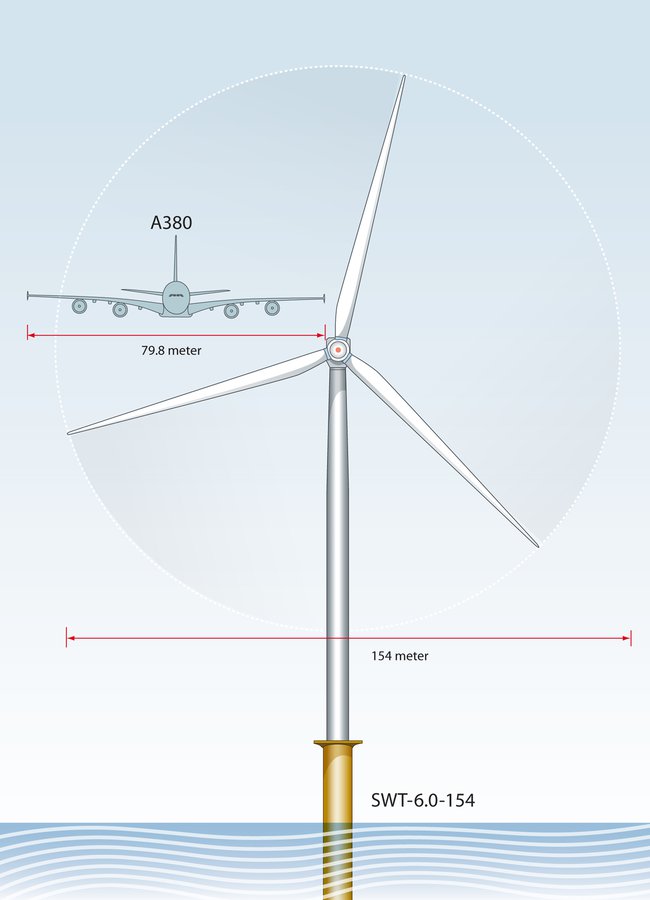
Each blade is almost as big as the wingspan of an Airbus A380, the world's largest airliner.
The overall width of the propeller is 75 meters (246 feet), Each rotor covers 18,600
square meters, which is the size of two and a half soccer fields.
The amount of electricity produced is 6 megawatts/hour.
The tips of the blades move at up to 80 meters per second, or 290 kilometers per hour
(173.2 miles per hour).
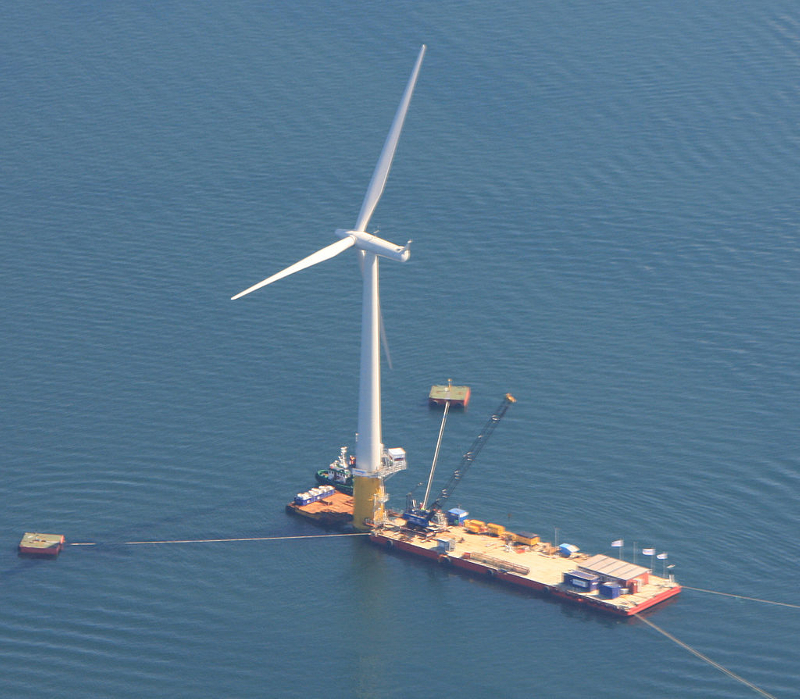
The final location. To show just how big the blades really are, if you look closely
at the picture above, you will see a tiny dot at the base of the tower, just to the right of
the block that holds the cable that comes in from the left side of the picture. That's a human.
As overly complete as this feedback package is,
you may have still gotten impressions for which
this feedback is insufficient. If so, more
information, pictures and videos can be found at
the following web sites:
Treehugger.com
Siemens Energy site
Wikipedia (history)
Gizmag.com
YouTube (rather dramatic advertising video)