
TARGET 101229
Building an Igloo
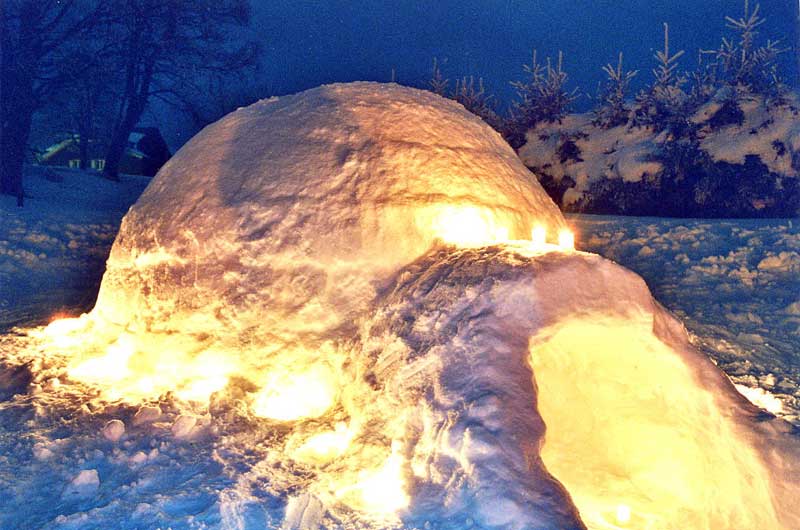
A safe place out of the dangerous weather.
When you're out in the wilderness and the weather and temperature get life threatening, and there is no shelter in sight, you are forced to build your own. If there is snow on the ground, then you're actually in luck. You can build an igloo.
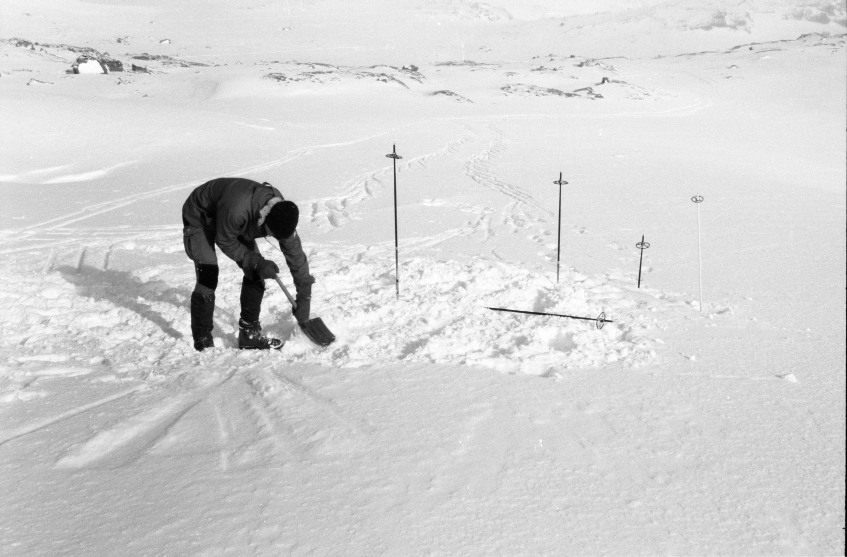
Step 1: Find a place to put it.
Hard snow is required to build an igloo - hard enough to make solid snow blocks. Even if the top layer of snow is soft, hard snow can usually be found underneath. If there just isn't any hard snow, you can usually pack and trample squares of the material to make your own blocks.
Use sticks to make a circle, marking the base of the dome at about 2 meters (6 feet) across. Don't make it too big, or you'll have trouble making the top bricks stay up. Ideally, The snow depth should be at least 1 meter (3 feet) where the igloo is placed, but this is not an absolute requirement.
Warnings and a list of tools you will need are listed on Wikihow.com:
- Be picky about your snow. It must be packable. Also, if there was a frost just before the snow and the bottom layer is slushy, it won't be comfortable to sit inside the igloo.
- It's good to have a shovel. A big shovel is best. You will also need carving tools and a saw.
- If you build it on a gentle slope, then plan for the entrance hole to ramp up slightly into the cave. (Face the entrance downhill) This will allow the cool air to 'fall out' through the entrance and the warmer air to stay inside.
- You will also use a cloth and your camping spoon. After you get it built, you will need to smooth out the inner dome walls as much as possible with the cloth and carve longitudinal grooves towards the entrance with the spoon to allow the water from the melting snow to flow outside without dripping on you.
- Have some water to drip over the top at night For added strength. This will allow the water to freeze and will make the walls stronger.
- Also have a candle. Poke a small hole near the top, and then light the candle inside the igloo and let it burn. The heat from the candle will partially melt the inside of the igloo, and then it will refreeze into ice, making your igloo stronger.
- Use the saw to make the joints between the bricks smooth and even, as there is no mortar for binding the blocks together. If necessary, force loose snow in to fill up the cracks and crevices as the igloo is built.
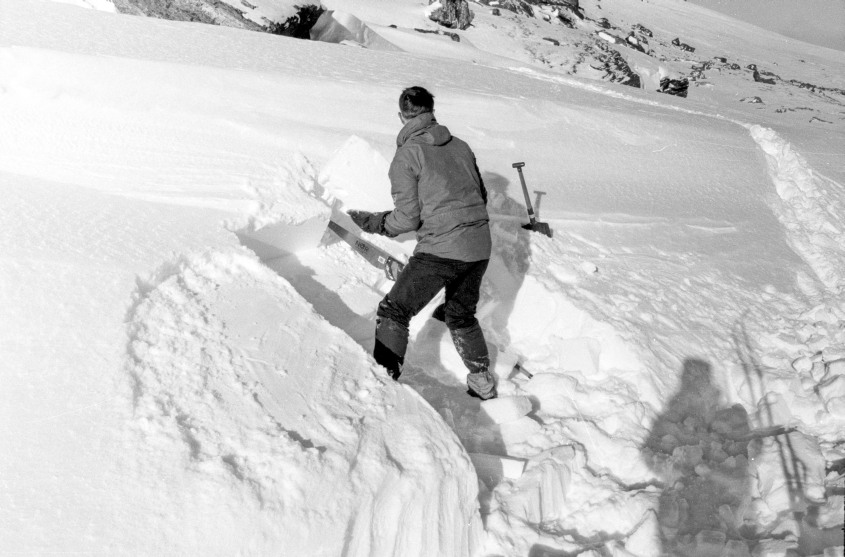
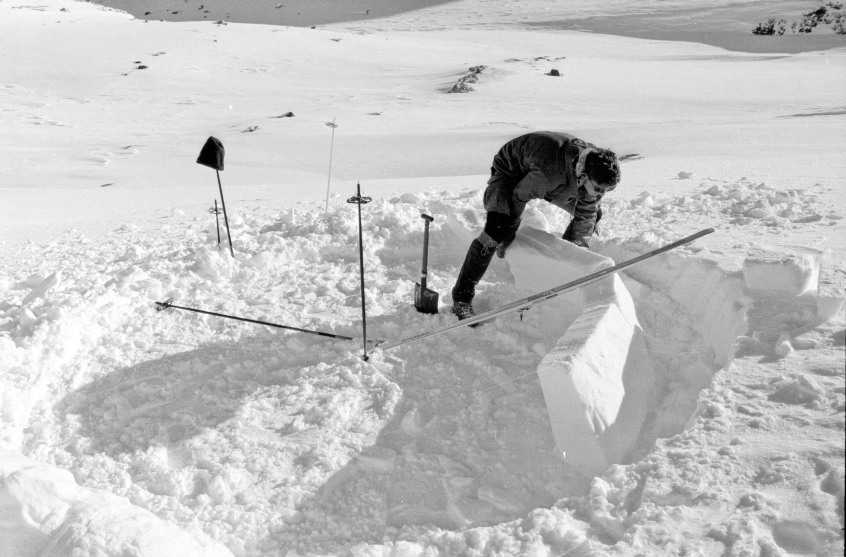
Step 2: Cut some bricks.
The snow blocks should be solid enough to be carried horizontally without breaking by their own weight. Large blocks are used at the base of the dome, smaller ones at the top. A thickness of 15-30cm (6-12 inches) is good. The blocks can be made extra strong by setting them up to harden in the wind.
Step 3: Starting the wall.
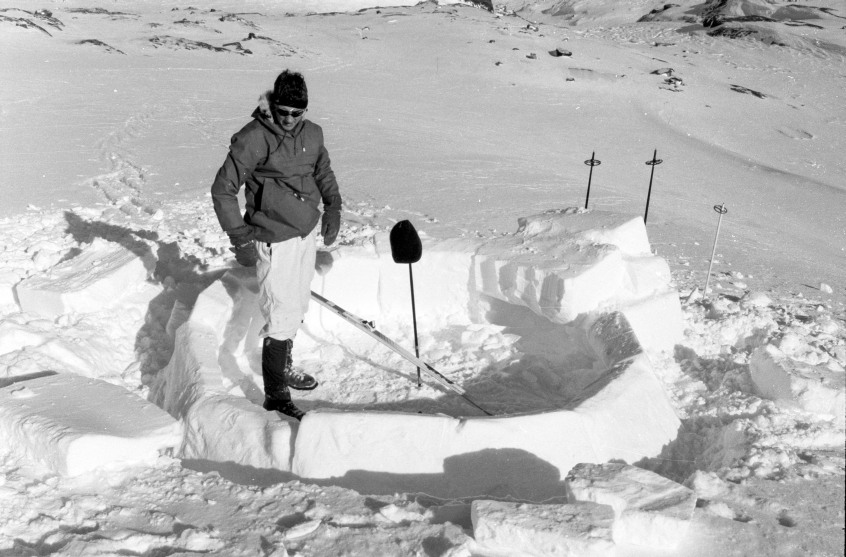
The edges of each snow block should be smoothed and angeled correctly to make a strong bond to the adjacent blocks. A ski with its tip placed in the centre of the igloo is a perfect tool for this. There will always be some (or maybe a lot of) cracks between locks, but that is fixed later. The tops of the blocks should be slanted upwards and outwards as you go around, with two vertical blocks at the sides of the entrance, pointing outwards with a solid block on top to make a small roof. (see photo, below) It might look tiny, but a lot of snow is dug out later. At this stage you might want to lower the floor inside the igloo to give you more headroom, later.
Step 4: Building upwards.
As you build upwards, keep removing the snow that falls inwards because of your shaping and fitting the blocks together. It is a lot easier to throw it out of the open dome than to shovel it out of the entrance afterwards.
If everything is done right, the dome will not collapse because the blocks are supporting each other. But in some critical situations, you might want to use a stick inside to support the topmost blocks until the dome is closed. Unless the igloo is small in height, the last few blocks are usually moved into the igloo through the entrance and lifted up in order to keep you from having to lean against the side of the igloo to place them on top.
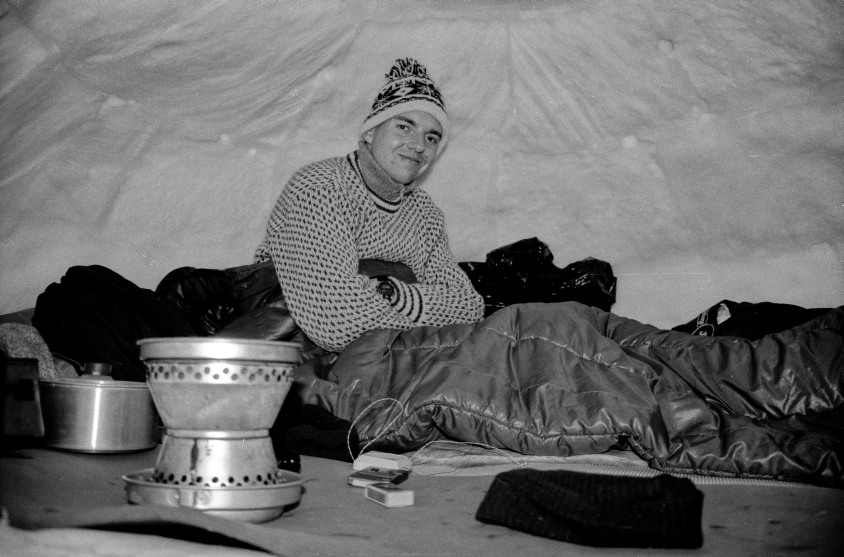
Moving in
Now it is time to fill all those cracks with snow, smooth the inside surface, cut the drainage grooves, finish the entrance, and settle in. An L-shaped entrance will prevent any snow from blowing straight in. Because some water may run down from the walls, some people like to make a risen sleeping bed with a few extra bricks.
Back to the warnings from Wikihow.com:
- Snow is heavy. Be careful and make sure not to try this alone in case the igloo collapses.
- Never build a fire inside, unless it is very small as it is very dangerous due to smoke inhalation and rapidly melting snow. Body heat and adequate clothing will keep you nice and warm inside without a fire. A candle is safer to use.
- Small cooking stoves are ok if the igloo is large and well-ventilated, but use it sparingly for heating water, not for warmth. Also, try placing the stove above head level so that the fumes vent out directly and you won't breathe them.
- It is vital to make at least one airhole in the roof to avoid suffocation. The igloo will get very warm inside with heat from your body, even if it is cold and windy outside. Without ventilation, lethal carbon dioxide will build up. Also, the use of stoves in an enclosed shelter is not recommended due to dangerous build-up of carbon monoxide.
FEEDBACK MAP
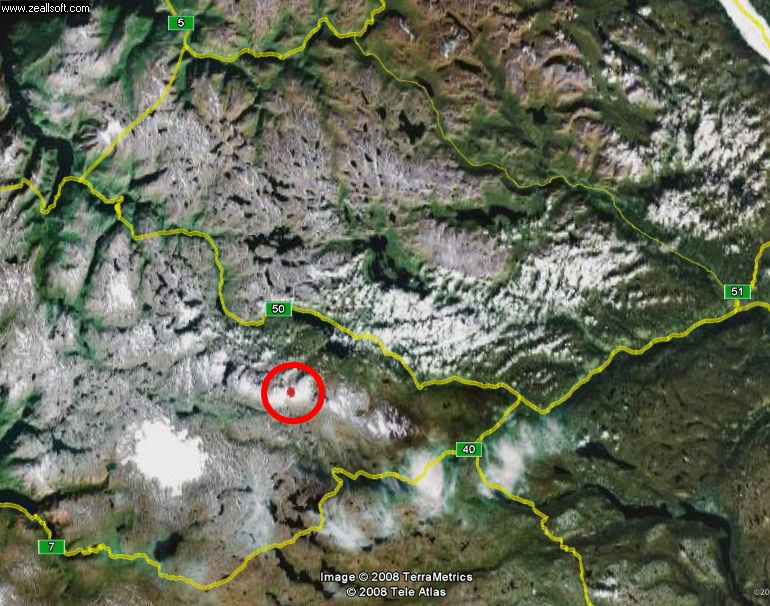
These photos are from a location north-west of Hallingskarvet, Hardangervidda, Norway, and were taken in March 1991. A fuller set of photos of this same igloo and more instructions can be found here.
To learn more about building an igloo, take a look at the following web site:
Wikihow
Igloo Building Web site
Captain Fletch Web site (Diagrams and instructions)
Many thanks to the Igloo Building web site, from which much of this material was procured. The photos are by Geir Drange. Participants of the igloo building project were: Ronny Finnema (architect), Geir Drange (photography, digging...), and Anonymous (handyman).